

Blog
How to Choose a Driveway Curb Ramp – 8 Easy Steps

The right driveway curb ramp starts with the shape of your curb and the point where your car scrapes. Before comparing materials or prices, check that the ramp matches the transition you need to cross. A ramp designed for a rolled curb is a different product from a loading ramp or a ramp for a tall, vertical curb.
This guide is written by the Smooth Curb team to help you measure, compare options, and decide whether our ramp suits your driveway.
1. Identify your curb and the scraping point
Look at the entrance from the side. A rolled curb has a rounded or sloping profile between the street gutter and driveway. A vertical curb has a distinct upright face. If you are unsure, compare the examples in our guide to curb types.
Note whether contact happens at the street-to-driveway transition or farther up the driveway. A curb ramp can help smooth the transition at the gutter. It does not change a steep crest farther uphill, repair a damaged driveway, or guarantee clearance for every vehicle.
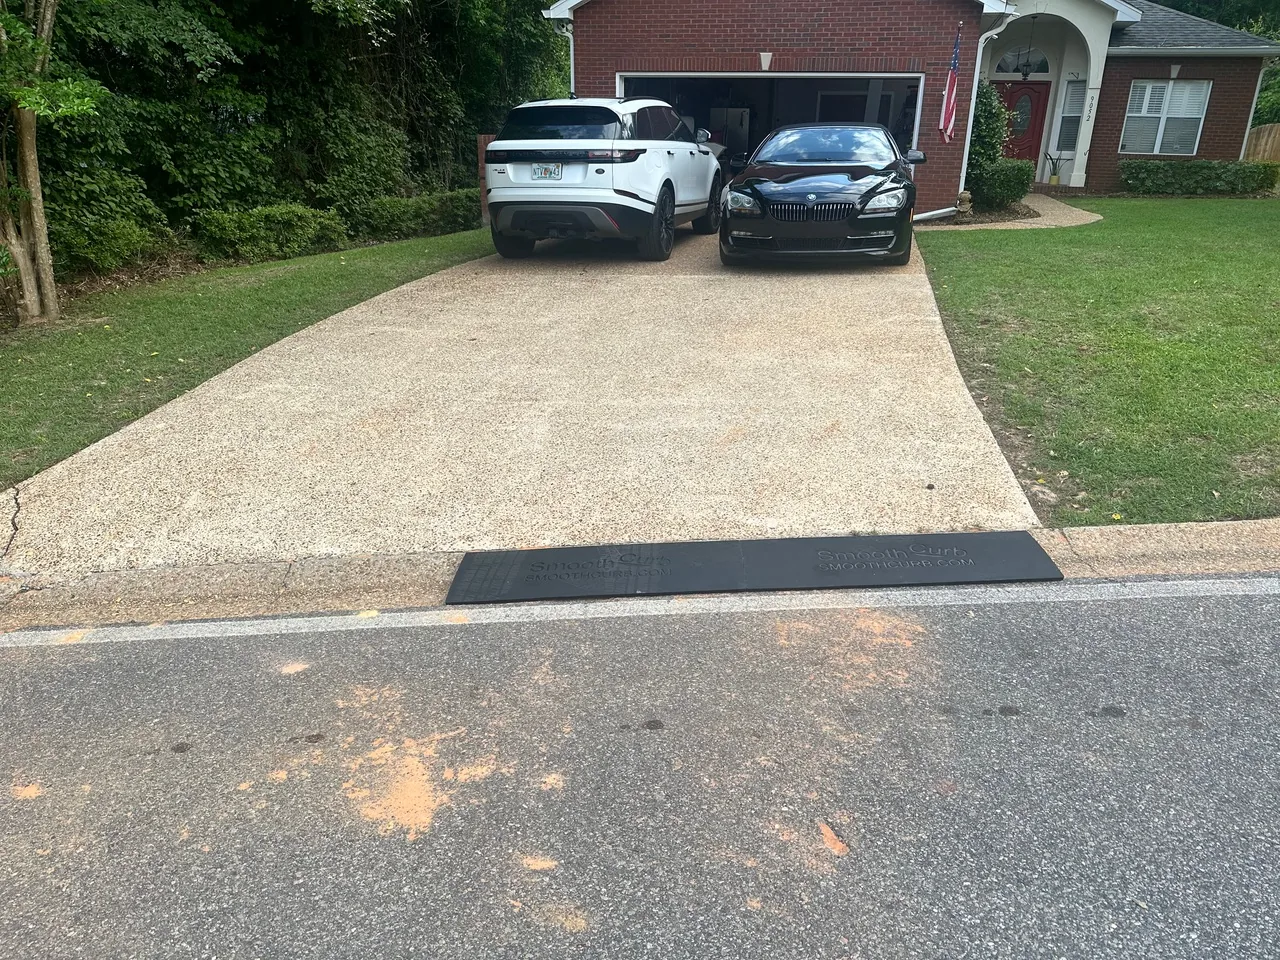
2. Measure height and front-to-back space
With the vehicle parked out of the way, measure the rise from the gutter surface to the driveway edge where the ramp would sit. Check several points across the entrance; the profile may change along the curb. Record the available space from the street side toward the driveway, too.
Compare both measurements with the ramp’s profile. Height alone is not a fit test: a ramp also needs to sit properly against the curb without rocking or leaving an unsupported transition. For reference, the Smooth Curb ramp system is listed at 144 inches along the curb, 17 inches front to back, and 3 inches high. Those dimensions describe the product; they do not establish a universal curb fit.
Where to measure your curb
Use these diagrams to record your own entrance. A is the vertical rise from the gutter to driveway-edge height. B is the horizontal distance from the proposed street-side ramp edge to the driveway edge. Show that starting point in your photo. Check both at the left, center and right of the area you plan to cover.
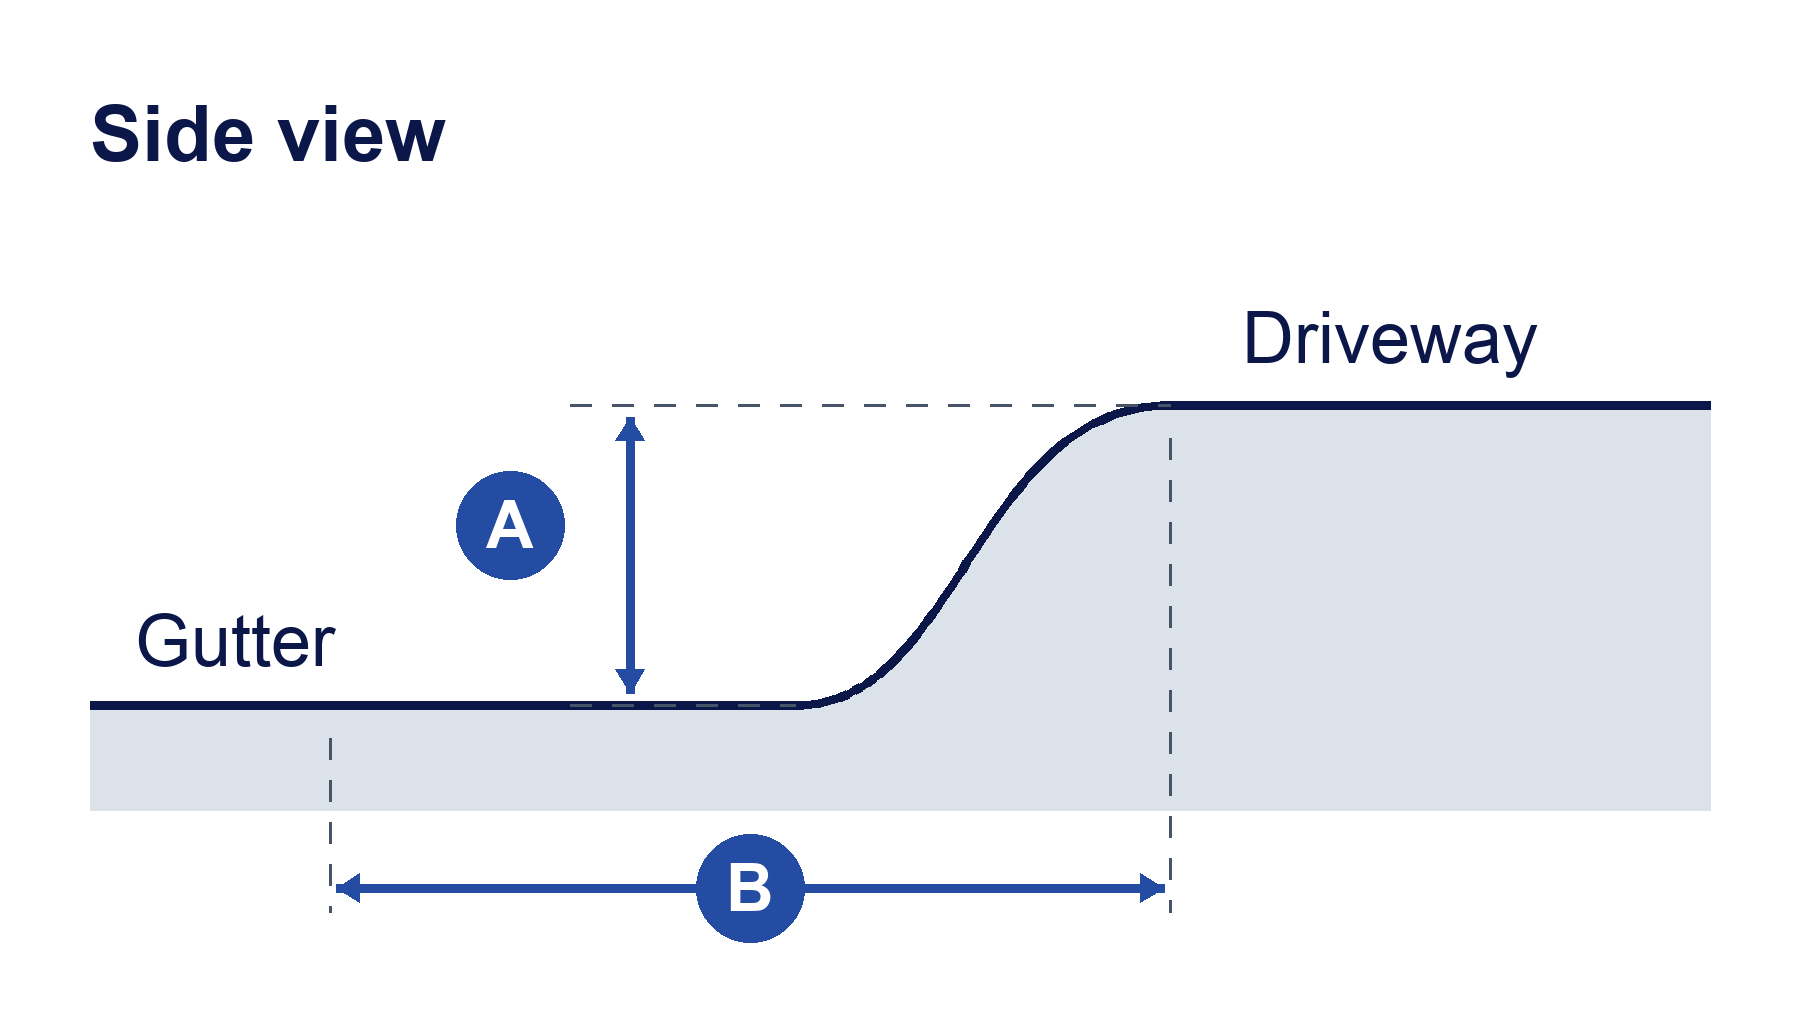
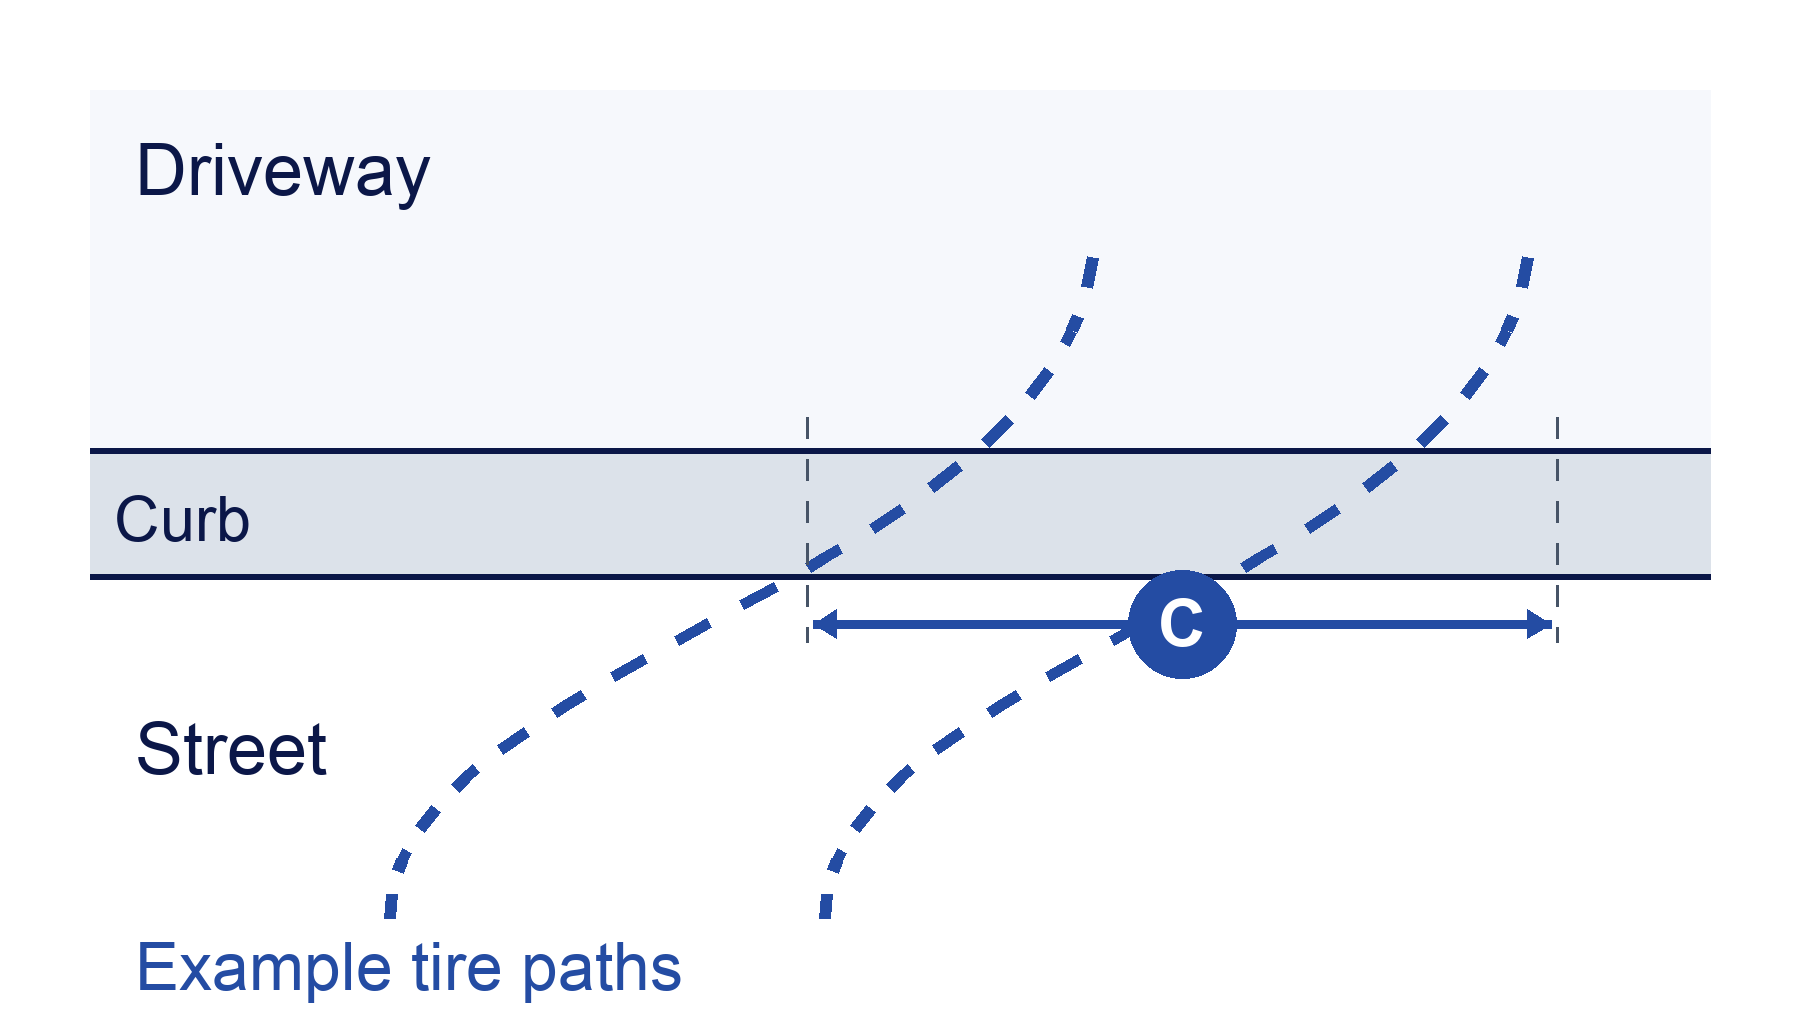
These illustrations are not to scale. Smooth Curb’s published 144 × 17 × 3-inch dimensions describe the product, not an approved curb-height range or a guarantee of vehicle clearance.
Download the curb-measuring worksheet (PDF)
A one-page sheet with both diagrams and spaces for your measurements.
Keep your vehicle parked out of the way while measuring. If you are unsure about fit, send the measurements, a side view of the curb, a full entrance photo and your vehicle details to care@smoothcurb.com before ordering.
3. Choose enough coverage along the curb
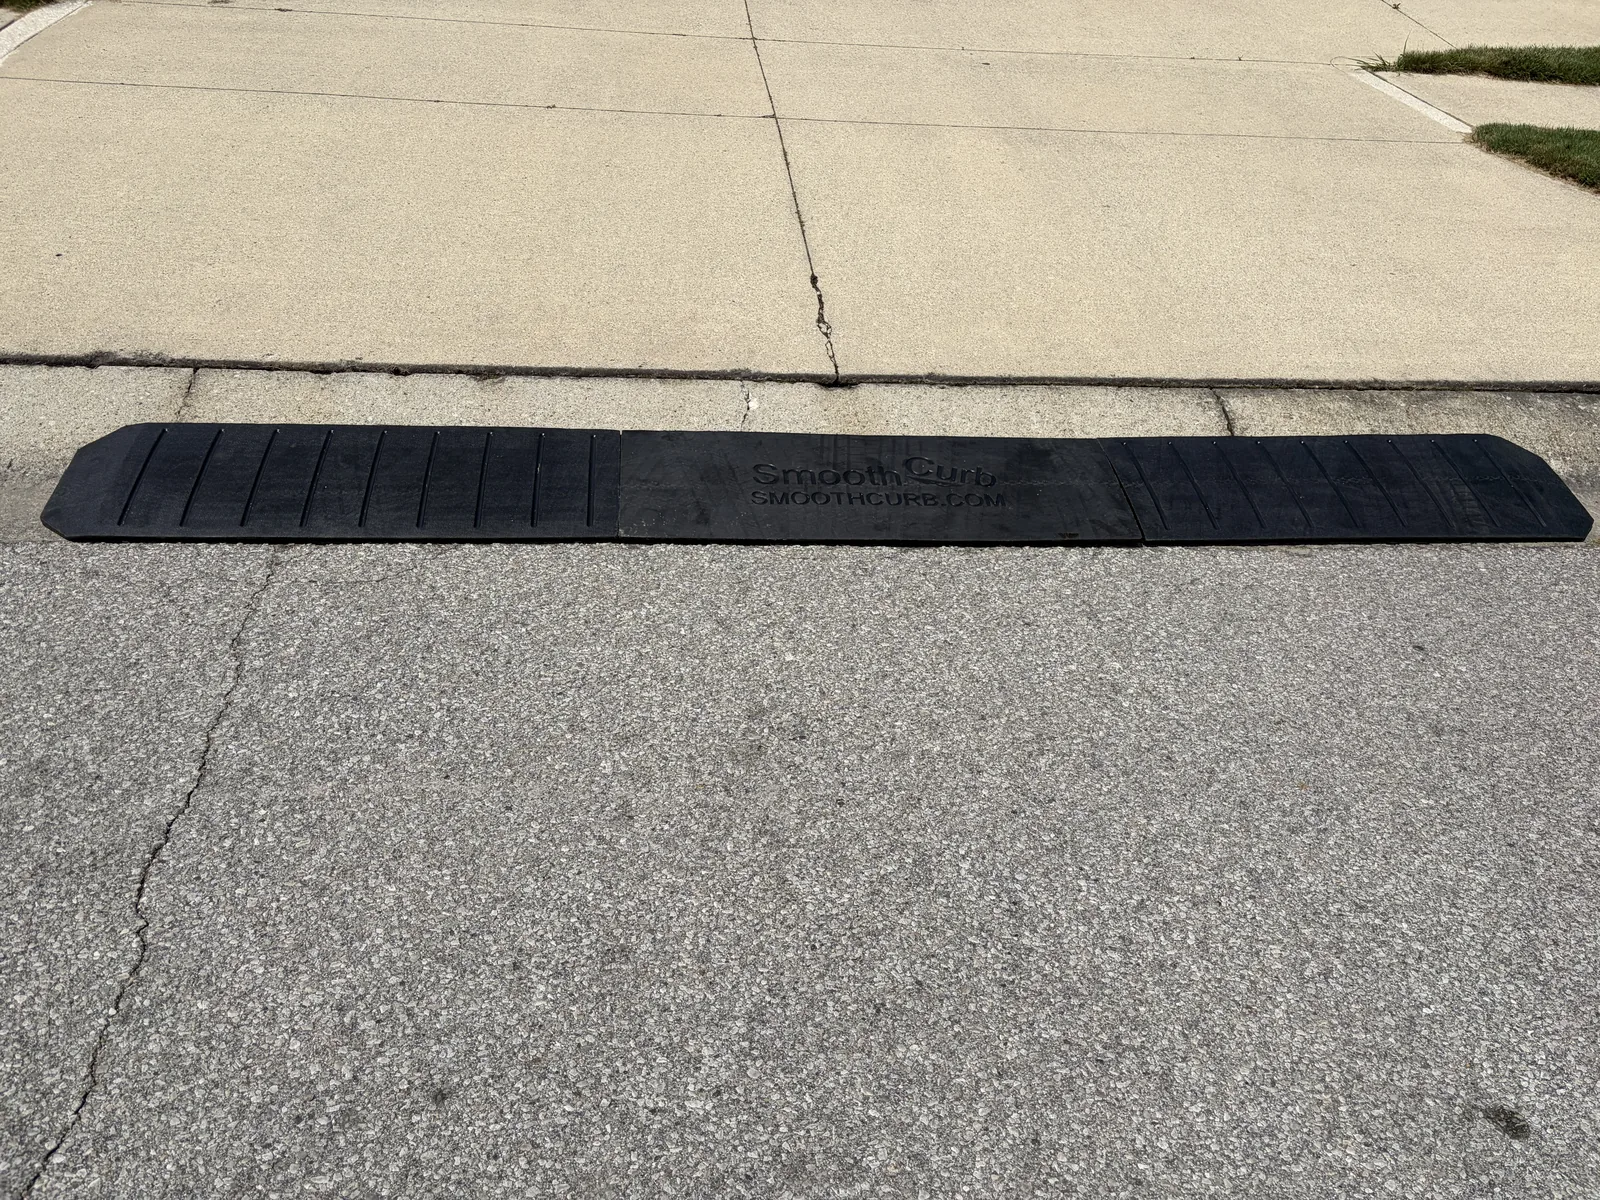
Measure the usable entrance width and consider the paths your tires take when entering and leaving. A 12-foot ramp does not cover every driveway, especially if vehicles turn across a wider entrance. Keep the travel path within the installed ramp’s coverage.
The standard Smooth Curb system has three sections spanning 12 feet. Each additional center extension adds 4 feet of coverage along the curb.
| Configuration | Total coverage |
|---|---|
| Standard three-section system | 12 feet |
| Standard system + one center extension | 16 feet |
| Standard system + two center extensions | 20 feet |
Extensions increase coverage from side to side. They do not make the ramp taller or lengthen its front-to-back transition.
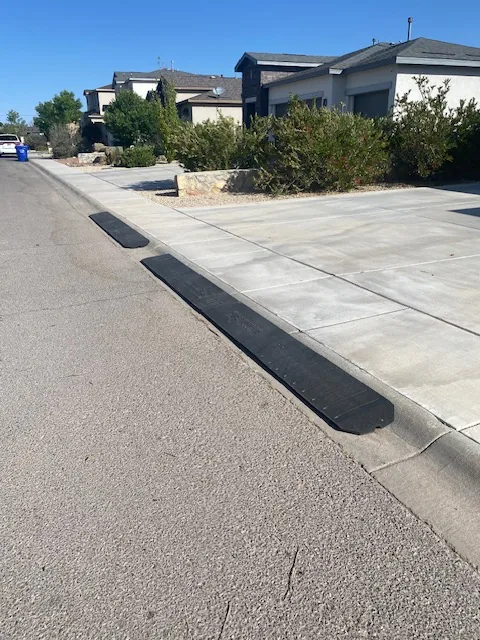
4. Compare material and load information
Look for a stated load rating, dimensions, installation instructions, and warranty terms for the exact product. Do not assume that a material name alone establishes strength or suitability. Rubber, plastic, and metal ramps come in different designs and intended uses.
Smooth Curb uses 100% recycled rubber. Its weight helps it stay in position, and its sections connect with bolts. Review the current product specifications against your intended vehicle and use. A load rating does not tell you whether a low front bumper will clear the transition.
5. Check drainage and the surface underneath
Inspect the gutter before placing a ramp. Note where water flows and remove loose debris from the seating area. Smooth Curb has a hollow center channel designed to let water pass underneath, but leaves, sediment, or an unsuitable placement can still obstruct drainage.
Check the channel after installation and as part of routine driveway maintenance. Keep access to nearby drains clear, and ask us about fit if the gutter has an unusual shape or pronounced curve.
6. Understand assembly and handling
Read the instructions before choosing a ramp. Our installation guide explains placement, connecting the sections with the supplied bolts and nuts, and returning the assembled ramp to position. Two people can usually install Smooth Curb in less than 15 minutes, according to our FAQ.
Plan for handling the sections, making adjustments, and accessing the connector bolts. Disconnect the sections before relocating the ramp, as described in our product FAQ.
7. Confirm placement requirements
Check the requirements that apply to your property, curb, gutter, and any shared or public space before installation. If applicable, ask your municipality, HOA, or property owner about the proposed placement. A removable product should not be treated as automatic permission to place it anywhere.
8. Review the complete purchase before ordering
Compare the full system, any extensions you need, shipping eligibility, assembly, and return terms. Smooth Curb offers free shipping within the contiguous United States. Read the return policy before buying, including the return window, return shipping responsibility, and restocking fee.
Use our driveway ramp install-kit checklist to compare included hardware, required preparation and total project scope before ordering.
If you have a lowered car, use our lowered-car ramp fit guide as a second check. If the curb profile or scraping point is unclear, contact the Smooth Curb team with your curb measurements, side-view photos, and vehicle details before choosing a system.