

Blog
Smooth Curb Ramp Maintenance: Cleaning, Inspection and Repair

Smooth Curb maintenance centers on the rubber sections, connecting hardware, placement and drainage path. Look for changes, remove accumulated leaves and sediment, and disconnect the bolts before moving sections for cleaning or repositioning.
Use this guide for routine care and for deciding when to ask Smooth Curb about a problem. Follow the current installation instructions for assembly and reconnection; the FAQ also states the disconnect-before-moving requirement.
Table of Contents
Inspect the surface, connections and placement
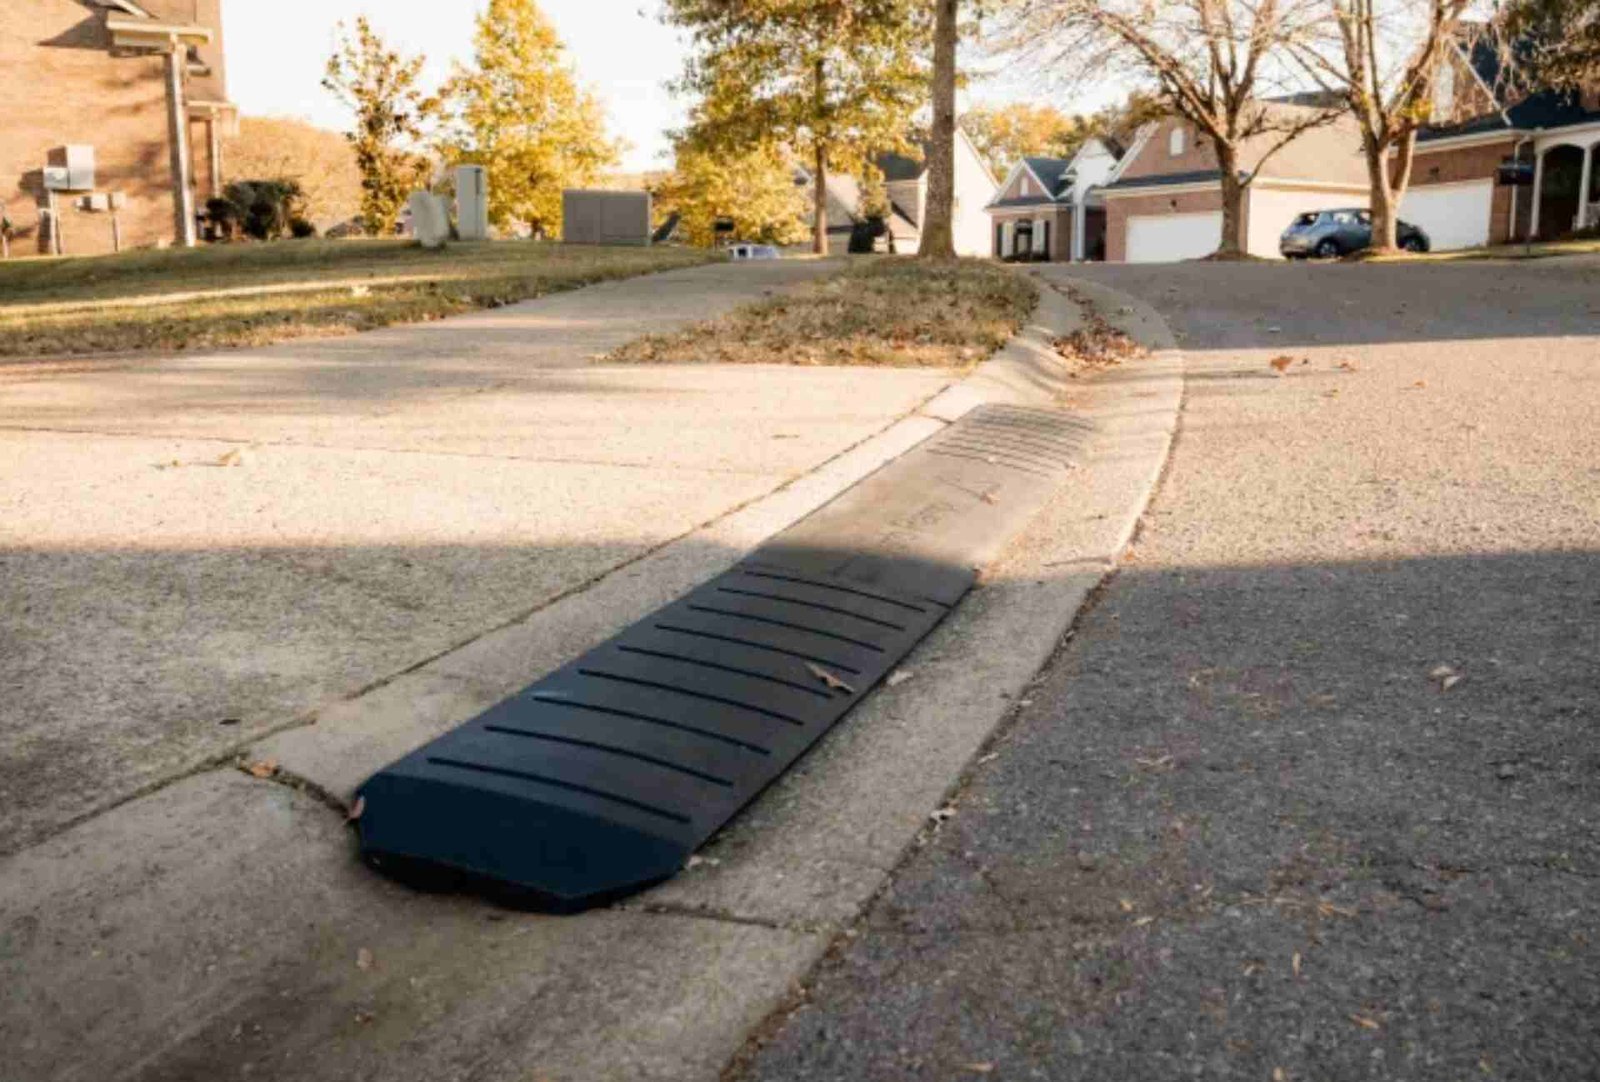
Make a visual check part of caring for your driveway. Look again when debris accumulates, the ramp changes position or a section needs attention. Use what you observe at your own entrance to guide your care.
Look for a change from the installed condition
- Rubber sections: look for visible cracks, torn edges, missing material or a section that no longer sits as expected.
- Connections: look for missing hardware, loose connections or visible damage near a connecting hole.
- Placement: compare the position with your intended tire paths and look for new gaps or uneven support.
- Drainage: look for leaves and sediment at the channel openings and in the surrounding gutter.
Check after something changes
A storm that leaves debris, nearby street work, snow-clearing activity or an observed impact are practical reasons to take another look. A photo of the installed position can help you compare it later.
Deal with visible damage before further use
If a section, connecting area or fastener looks damaged, avoid driving over the affected ramp while you seek guidance. Photograph the problem and contact Smooth Curb. Do not assume that tightening a damaged connection or covering a crack restores its capacity.
Clear debris from the ramp and drainage path

Start with leaves and sediment
Remove loose debris from the top surface and the surrounding gutter. Check the openings of the hollow channel beneath the ramp, which is designed to let water flow underneath. Remove accumulated leaves and sediment rather than assuming that an opening at one end means the entire route is clear.
Check the area beneath the sections
When debris underneath needs attention, first plan how to handle the sections and keep the work area clear. The standard three-section system weighs 128 pounds. Arrange help appropriate to the handling task.
- Disconnect the bolts before moving the sections, as required by the FAQ and installation page.
- Move the disconnected sections so you can reach the gutter and underside.
- Remove the accumulated leaves, sediment and other loose debris from the placement area and channel.
- Inspect the sections and connecting areas while they are accessible.
- Reconnect and position the sections using the official assembly instructions.
Ask before using a cleaner or surface treatment
The current support instructions do not list compatible cleaning chemicals, pressure-washer settings, lubricants or coatings. If debris removal is not enough to address a spill or buildup, ask Smooth Curb about the specific substance before using a cleaning product or treatment.
Disconnect before repositioning sections
If the ramp has moved, note which sections shifted and in which direction before changing anything. Take a photo of the position, the curb and the usual tire paths. Check for debris underneath and confirm that the planned coverage still matches how the entrance is used.
Move the sections using the documented procedure
Disconnect the bolts before moving the sections. Do not lift the center of the connected system to drag it sideways or flip an installed set by pulling one end. After moving the disconnected sections, reconnect and position them according to the installation guide.
Investigate repeated movement
If movement continues after cleaning and repositioning, contact Smooth Curb with the photos and details of when it happens. The FAQ says the ramp is designed for rolled curbs and its weight helps hold it in place. That does not promise that it will never shift at every entrance.
If the curb or the vehicle using it has changed, revisit the fit worksheet. Adding sections changes coverage along the curb; it does not resolve every placement or profile issue.
A five-point check, twice a year
- Where is it scraping now? If the car has started touching somewhere new, note whether it is the front lip, between the axles or the rear, before assuming the ramp has moved.
- Is the ramp where you put it? Compare against the photo you took on installation day. A section that has walked out of position usually means a loose connection or debris underneath.
- Are the connections tight? Check each bolt and nut; retighten with a wrench, not by adding different hardware.
- Is the channel clear? Pull leaves and sediment out of the underside channel and the gutter on both sides, then watch how water moves during the next rain.
- Is the rubber intact? Look for cuts, chunks missing at the edges, and cracking around the bolt holes. Cosmetic scuffs are normal; a split section is a call to us.
Keeping the entrance looking tidy
Most of what makes a ramp look bad is not the ramp. Keep grass, mulch and edging out of the tire path and away from the gutter so debris does not collect against it. Rinse it with a hose when it gets dusty; skip pressure washers and driveway solvents, which can lift the binder from the rubber. Do not paint or coat it to hide damage without asking first, because coatings change the surface grip. In winter, keep the edges of the ramp visible after snow so the plow and the car both know where it is, and follow the deicer guidance we give rather than whatever is on the shelf; some products are hard on rubber binders. Take a reference photo when it is clean and correctly placed so you have something to compare against next season.
Know when to ask about repair or replacement
The current support pages do not publish a rubber-patching procedure or specifications for substitute hardware. Contact Smooth Curb before patching a section, altering connecting holes or installing replacement fasteners. Include close-up photos and a wider view showing the affected section in place.
For a connection that needs attention, follow the official instruction that bolts should be slightly more than hand-tightened. Follow the published tightening guidance; contact Smooth Curb if a connection will not secure as shown. Report damaged or missing hardware so the appropriate next step can be confirmed.
For snow-clearing arrangements, use the winter care guide. For removal and storage planning, see moving and storing Smooth Curb.
Keep a simple record of problems and adjustments
Record what you noticed, when it happened and what you changed. Photos before and after clearing debris or repositioning can help Smooth Curb assess a recurring issue. Keep any guidance you receive with your installation instructions.
Ramp care also cannot determine whether a vehicle was damaged by contact. If your car has developed a new noise after scraping, consult the separate guide to scraping followed by a new noise. For a concern after tire contact with a curb, see tire damage from hitting a curb.